The proving ring implements a simple principle of physics to provide precise and tangible indication of applied weight ranging up to hundreds of thousands of pounds.
Engineers who work with sensor-based data acquisition systems know that verifying and calibrating the performance of the sensor itself is often the most difficult part of assuring the performance of the channel, rather than calibrating the electronics portion. This is especially the case when the highest performance is required. After all, ensure performance to, say, 1% is usually not too difficult but getting to 0.1% represents not only an order of magnitude improvement in accuracy but is usually more difficult by order of magnitude (or perhaps several orders) for test set-up and minimization of subtle sources of error.
Calibrating the full sensor-to-processor channel, for example, takes much more than a high-precision voltage source and digital voltmeter. There are two basic ways to approach this calibration of the sensor: use a known, better sensor in place of the one to be used and compare readings; alternatively, use a calibrated stimulus to the sensor and measure the sensor’s transfer curve (external stimulus versus sensor output).
Each approach has tradeoffs, of course. For checking time or distance, traceable standards are available at modest cost to be used as calibrators, including an atomic clock for time, or light-wavelength system for length. For some sensed parameters such as temperature, it is relatively difficult to create a calibrated stimulus, but it can be done in special cases.
For weight (force) calibration of load cells and strain gauges, the challenge is more severe, as engineers might have to resort to deadweights, which are traceable back to the National Institute of Standards and Technology (NIST) or an equivalent standards organization. Note that the unit of weight and force is newtons in the SI system, but more-often dimensioned as mass, in kilograms; or pound-force in the non-metric world, but usually just called a pound. (If you are confused about using units of mass rather than weight and force, see here for clarification.)
In principle, it shouldn’t be difficult to check load cells and strain gages with weights. Just buy some calibrated weights and leave them in a cabinet or storage room until needed. In reality, however, it is a huge deal, especially as the required weight increases into the hundreds, thousands, tens of thousands of pounds, and perhaps even more. The problems become obvious as moving those proof weights is a major logistic headache, attaching them to the measuring sensor and system under test is a technical challenge, and they take up considerable space even when not in use.
Incidentally, after decades of intensive study and analysis supported by experimental work, NIST and other international standards-setting organizations recently formally redefined the definition of the kilogram in terms of absolute physical constants rather than rely on the primary standard platinum bar in Paris (See the final four References). Now, in the SI or International System of Units (abbreviated from the French Système international (d’unités), the kilogram is defined using a fixed value for Planck’s constant and the definition of the meter and second, which are already based on constants. This re-definition fulfills a metrology goal of many decades and allows for a complete metrology system where all the primary constants can be created anywhere using reproducible arrangements rather than relying on a tangible physical artifact. However, unlike dead weights, the complex instrument for creating a “perfect” standard kilogram under this new definition cannot be used as a transfer standard.
Fortunately, there is a better approach than the use of dead weights as the solution to the dilemma of verifying weight and force: the proving ring. This ring is a conceptually simple weighting simulator and readout, developed in the 1920s at the National Bureau of Standards (NBS, renamed as NIST in 1988).
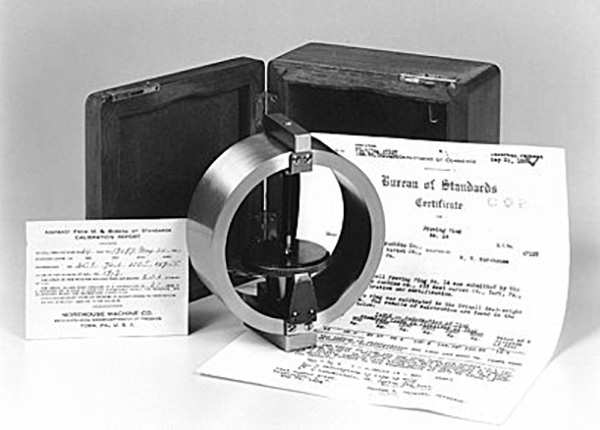
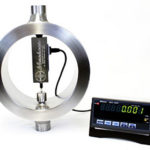
The proving ring is a metal ring which flexes under an applied load and is simple in concept and appearance (Figure 1). If fabricated properly, the ring’s diameter will change with a consistent, reliable, linear relationship of load versus deflection. The ring’s deflection spans bidirectional use, stretching for tension loading, and shrinking for compression loading. As a result of the load versus deflection characteristic, it provides the precise equivalent of deadweight calibration indication, but at a fraction of the size, cost, and weight.

The virtues of proving rings include:
- Stability: when maintained properly and not mistreated or abused, they have negligible or even zero long-term drift.
- Longevity: some proving rings built in the 1930s are still in use today.
- Accuracy: proving rings often maintain uncertainties of 0.0125 – 0.025 % of full scale.
- Reliability: if used within their specified limits, they do not fail; they are even used on the International Space Station (ISS).
- Zero-power operation: the proving ring consumes no power, whether in storage or in active use.
Part 2 of this article looks at the development of the proving ring and its practical implementation.
EE World References
- High Capacity Reaction Torquemeters Carry NIST Calibration
- Load Cell Designed to be Hermetically Encapsulated
- Subminiature Compression Load Cells Offer Reliability and Space Efficiency
- Stress & Strain, Part 2: Implications for electronics
- Stress & Strain, Part 1: Fundamental principles
External References
- “Proving Rings for Calibrating Testing Machines,” Bruce R. Wilson, Douglas R. Tate, and George Borkowski, National Bureau of Standards, 1946, page 216
- “Temperature Coefficients for Proving Rings,” Bruce R. Wilson, Douglas R. Tate, and George Borkowski, National Bureau of Standards, 1946, page 207
- NIST, “Calibration of the Proving Ring”
- Morehouse Instrument Company, Inc.
- “World in the balance: the historic quest for an absolute system of measurement,” Robert P. Crease, W.W. Norton, 2011.
- NIST, S. Patent 1648375
- Slideplayer, “Measurement of Force, Torque, and Pressure”
- NIST, “The Proving Ring Design”
- Hareeshna Gowda, “Unit 6: Force, Pressure, and Torque Measurement”
- NIST, “For All Times, For All Peoples: How Replacing the Kilogram Empowers Industry”
- NIST, “A Turning Point for Humanity: Redefining the World’s Measurement System”
- NIST, “Toward the SI System Based on Fundamental Constants: Weighing the Electron”
- NIST, “Universe’s Constants Now Known with Sufficient Certainty to Completely Redefine the International System of Units”


