Designing anything begins with definition — deciding what it should do. That should go without saying, but sometimes we get so involved with details that we can lose sight of the purpose of a project. A case in point is injection molding; there are so many variables, so many attributes to choose from, and so many decisions to make that in the process of optimizing one or more aspects of a design, we may lose sight of what we wanted the thing to do.

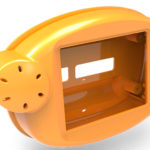
For example, we may get so wrapped up in the details of surface finish that we forget that not all surfaces of the final product need to have the same appearance. A lesson from history: Carpenter’s Hall in Philadelphia, meeting place of the first Continental Congress in 1774, was designed originally to showcase the skills of the craft guild that erected it. Yet a look inside the cupola will show that the interior surface of the brickwork is rough and unfinished, left that way because it would not need to withstand the weather and would never be seen. The moral: Don’t spend time and resources making pretty that which does not need to be pretty.
Choosing the material
Once you’ve settled on exactly what your part needs to do, it’s time to choose the resin from which to make it. Start with the required mechanical properties of the part, including its strength at normal and high temperatures and its impact resistance.
Look at the characteristics of the available resins, such as how resistant they are to deforming during cooling and how well they fill small features of a mold. Consider whether the resin will need reinforcing fibers for additional strength, and or other additives — for example for UV resistance, flame retardance or special colors. Study the candidate resin’s mechanical and chemical information from the manufacturer’s material, technical, and safety data sheets.
Consider whether the finished part will require FDA compliance or UL ratings.
Look closely at cost.
A rundown of major properties of the most-used resins is available here.
Thermoplastics versus Thermosets
Two broad categories of plastic materials are available: thermoplastics, which melt under heat, and thermosets (such as liquid silicone rubber), which harden irreversibly under heat. Carefully consider factors such as strength, impact resistance, performance at high temperatures, and other elements when selecting materials.
Cosmetic appearance
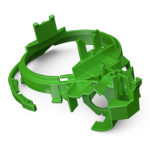
Parts and features that are going to be hidden from view don’t have to please the eye. They make the part work but don’t necessarily make it pretty. That said, to make the A side look good, you have to put a lot of thought into the B side. Think of the A side as the form and B side the function of your molded part.
Sweating the details of molded parts
Moldability is vital, and there are several considerations to keep in mind.
Whenever possible, keep the thickness of a part’s walls consistent, for simplicity and strength. Plastic shrinks as it cools, and it cools from the outside in. This can cause the walls to be pulled inward, a process called sink, or cause internal stress or voids. Inconsistent wall thicknesses can cause parts to warp; note that the capability to make thick walls or other features without warping differs from resin to resin. A chart that shows recommended materials by wall thickness is available here.
You can sometimes reduce part warping by changing the locations and shapes of gates or by enhancing the mold’s cooling capacity. However, it is better to control cooling and warp with geometry—that is, a good design—versus using tricks.
While consistent wall thickness is vital to avoid warp, don’t make the walls precisely the same thickness from to bottom, or it will be next to impossible to get them to unmold easily. Instead, make them taper, just slightly. That wall angle feature is called a draft.
Rounded corners allow the material to flow more efficiently during injection and also reduces the stresses on the material during cooling, which helps reduce the part’s tendency to bow, warp, or develop fragile corners. Read more on the placement of corner radii here.
The two halves of a mold meet at what is called the parting line. Depending on how the mold designer created the A and B sides, there may be a thin blemish around the outside of your part. If you need to have a sharp edge on a part, it’s best to try to have that edge make up part of the parting line because it reduces or eliminates the blemish.
Summary
Before beginning a design of an injection-molded part, think about all the factors involved; and make sure you have paid attention to what’s important and avoided paying too much attention to what’s not. It can help prevent missteps, design errors, and project delays.


Leave a Reply
You must be logged in to post a comment.